How to Add Year Make Model Search to Your Shopify Store
A practical guide to adding Year / Make / Model (YMM) fitment search to Shopify — what it is, why it matters, the three ways to do it, and what each one actually costs.
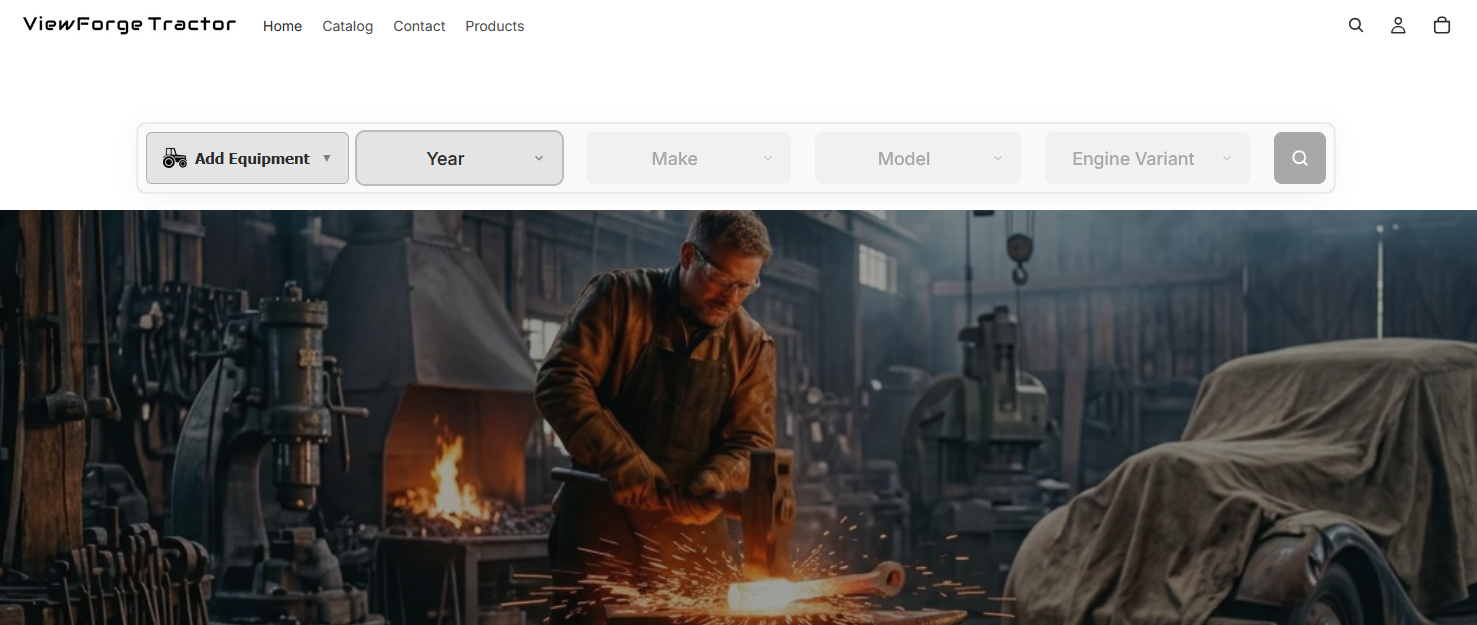
If you sell parts online — auto, motorcycle, tractor, marine, power equipment, even printers — your customers don’t care about your catalog taxonomy. They care about one question: does this fit my thing?
The way you answer that question on a Shopify store is called Year / Make / Model search (YMM for short). Three dropdowns — or four, if you need Submodel — and a button that says “Find Parts.” The customer picks “2019 Ford F-150 XLT,” and your catalog filters down to parts that actually fit.
This guide walks through what YMM search is, why it’s non-negotiable for parts merchants, the three main ways to add it to Shopify, and how to set it up without giving up control of your fitment data.
What is YMM search (and why is it a big deal)?
YMM search is a fitment filter. It narrows a catalog by vehicle (or equipment) configuration so the customer only sees parts that fit.
It matters because the alternative — a customer guessing whether a part fits — creates two expensive problems:
- Wrong-part returns. Auto parts return rates hover around 20–30% industry-wide. A big chunk of that is fitment. Every wrong-part return is a refund, a restocking cost, a shipping cost, and a customer who won’t come back.
- Pre-purchase friction. If a customer can’t confirm fit, most will bounce to a competitor who can answer the question. YMM search is not a “nice to have” for parts merchants — it’s the difference between a 2% conversion rate and an 8% conversion rate.
YMM isn’t automotive-only. The same pattern works for any catalog with compatibility rules:
- Tractor / Agriculture — Make / Model / Year / Implement
- Marine — Make / Model / Engine Year / HP
- Motorcycle — Year / Make / Model / Trim
- Power Equipment — Brand / Model / Serial Range
- Bicycle / E-bike — Brand / Year / Model / Wheel Size
- Printer / Office — Brand / Series / Model / Region
- Electronics — Brand / Device / Model / Generation
The name “Year Make Model” is just the automotive case. The pattern underneath is predicate search over a compatibility dataset, and it applies anywhere a catalog needs “does this fit?” logic.
The three ways to add YMM to Shopify
1. Roll your own with metafields + Liquid
Shopify has metafields and metaobjects. In principle, you can model fitment records as metaobjects, tag products with compatibility references, and write Liquid to render the dropdowns and filter the collection.
This is possible. It’s also a lot of work.
You’d need to build:
- A data model for configurations (Year / Make / Model as metaobject definitions)
- A data model for fitment records (product → configuration references)
- A bulk import path for CSV data (most parts merchants have spreadsheets)
- The storefront UI (dropdowns, cascading logic, URL state)
- The backing search index so filtering is fast on collections with thousands of products
- An admin interface for merchants to manage fitment without editing JSON
Budget 200–400 hours of engineering to do it well. And metafields have subtle gotchas — Liquid’s complexity analyzer can throttle pages that read metafields cold, and undefined metafield access on a target: body app embed can push a page past Shopify’s complexity ceiling and return HTTP 500. We learned this the hard way.
2. Install a YMM app from the Shopify App Store
This is what most merchants pick. There are roughly half a dozen YMM / fitment apps on the App Store, ranging from ~$19/month to ~$850/month. The main trade-offs between them are:
- Where does your fitment data live? Most apps store fitment in their own external database. If you uninstall the app, your data goes with it.
- How do you get data in? CSV import? API only? Manual entry? If you have 10,000 fitment records, manual entry isn’t a path.
- What verticals does it support? Several apps are automotive-only. If you sell tractor parts, marine, or power equipment, check before you install.
- Can it read fitment out of your existing product copy? Some apps require you to build the fitment dataset from scratch. Others can parse your product titles and descriptions and extract fitment automatically.
- What’s actually in each tier? Bulk import, VIN lookup, and saved-vehicle features are usually the things that get gated. Check the tier you’d actually be on, not the one on the marketing page.
We built ViewForge specifically to fix three problems we saw with the existing options:
- Data ownership. ViewForge stores fitment records as Shopify-native metaobjects. Uninstall ViewForge, your fitment data stays in your store. Reinstall it, or replace it with another tool that reads metaobjects — it’s your data, not ours.
- Eight verticals, not one. ViewForge ships with presets for automotive, motorcycle, agriculture/tractor, marine, power equipment, bicycle/e-bike, printer/office, and electronics. Custom setups for anything else.
- It can read fitment out of the copy you already wrote. Point it at a title like “Front Brake Pads for 2017-2021 Honda Civic LX/EX/Touring” and it extracts the fitment records for you. Saves weeks of manual entry on a legacy catalog.
Here’s what each tier includes, so you can work out which one you’d actually be on before you install:
| Plan | Price | Products with fitment | What it adds |
|---|---|---|---|
| Free | $0 | 50 | Manual entry, all 8 verticals, the storefront blocks (search, saved vehicles, fitment table, “fits your vehicle” badge) |
| Starter | $19 / mo | 1,000 | CSV import, custom setups beyond the 8 presets, per-collection search boxes, fuzzy matching, coverage reporting |
| Professional | $49 / mo | 5,000 | Smart Parse — pulls fitment out of your existing titles and descriptions |
| Premium | $240 / mo (or $2,400 / yr) | Unlimited | NHTSA / VIN decode, ACES / PIES import, dedicated onboarding |
Two things worth being blunt about, because they decide which plan you need:
- Bulk import starts at Starter. The free plan is manual entry. It’s a real tier — 50 products with fitment is enough to prove the thing works on your own store — but if you have a spreadsheet with 4,000 rows, you’re on Starter or above from day one.
- Smart Parse is a Professional feature. If your plan is “let the app read my product titles instead of building a spreadsheet,” that’s $49/month, not free.
3. Hybrid — custom metaobjects + a thin app
Larger merchants sometimes model fitment themselves with metaobjects but use an app for the storefront UI and search index. This works, but you’re taking on most of the maintenance burden of option 1 without getting all the cost savings. Usually not the right call unless you have very specific data requirements.
How to set up YMM search on Shopify — step by step
Using ViewForge as the example. The high-level steps are similar for any YMM app.
One note on vocabulary before we start. This guide uses the industry words — fitment, fitment records, YMM — because that’s what the category is called. Inside ViewForge you’ll see plainer ones: your search box is the set of dropdowns a shopper uses, what fits what is your fitment data, and add data is the import screen. Same things, fewer syllables.
Step 0 — See it working before you build anything
The mistake most merchants make is spending a weekend on a spreadsheet before they’ve ever seen the search box on their own storefront.
ViewForge’s setup opens with See it working first. It creates a handful of demo products in the vertical you pick, wires them to a search box, and puts it on your store — so within a couple of minutes you’re looking at a working fitment search on your own theme, with your own fonts and colors, instead of a screenshot on a marketing page.
It’s free on every tier, the demo products are tagged so they’re easy to remove afterwards, and it answers the question that actually matters: does this look right on my store? Answer that before you touch your catalog.
Step 1 — Choose how shoppers pick their vehicle
This is the part most apps call a “template.” It’s the set of dropdowns and their order — for automotive, Year / Make / Model, plus a fourth for engine or trim if your parts need that level of precision.
Pick a vertical preset or define your own. Three levels is the floor; four is the ceiling, and the fourth is optional — leave it blank and it disappears from the storefront.
Two decisions here are worth more thought than they look:
- How many dropdowns you actually need. Fewer questions is faster for the shopper but returns a broader result set. Four questions is precise and slower. If your fitment data is only accurate to the model, don’t ask for the engine — you’ll produce “no results” for parts that fit.
- How many of those a product page checks. ViewForge stores this separately from the search box: shoppers might answer all four, while the product page’s “fits your vehicle” badge only checks the first three. Setting the product-page number higher than your data supports is the usual cause of “it says it doesn’t fit, but it does.”
The editor puts a live preview at the top that updates as you type, so you can see the dropdown labels a shopper will read while you’re writing them.
Step 2 — Tell us which products fit which vehicles
This is 80% of the work, and it’s where most YMM projects quietly stall. Four ways in:
- Manual entry (free on every plan). For small catalogs, or for the long tail after a bulk import. Also the honest answer for a store under ~50 SKUs — you don’t need a paid plan for that.
- CSV import (Starter and up, $19/mo). One row per product-and-vehicle combination. If you have a spreadsheet — most parts merchants do, usually exported from a supplier’s ACES dataset or an internal inventory system — upload it and map the columns. Fuzzy matching catches near-duplicates so “Chevrolet” and “Chevy” don’t become two makes.
- Smart Parse (Professional, $49/mo). Points at your existing product titles and descriptions and extracts fitment from them. You review what it found before anything is saved. Best for catalogs where the fitment info is already written down, just not structured.
- ACES import (Premium). The industry XML file your supplier or catalogue provider sends. If someone has handed you an ACES file, this is the path; the mapping is handled for you.
Whatever you use, don’t try to do the whole catalog at once. Cover your best sellers first. A shopper who searches and gets nothing concludes the search is broken — which is worse than not having one — so partial coverage on the products people actually search for beats thin coverage everywhere.
Step 3 — Add the search box to your store
This is a theme block. ViewForge opens your theme editor and drops the block where you want it. Typical placements:
- Homepage hero — big, centered, can’t miss it
- Collection page header — so customers can narrow a category
- Product page — a “fits your vehicle” badge that validates the product against the shopper’s saved vehicle
Touch targets of 36px or larger (Shopify’s web component standard), mobile-first, and the dropdowns cascade — picking a Year filters the Makes to only makes that exist for that year.
One thing to know for later: a theme change can knock the block off your store. Your fitment data is untouched, but the block isn’t placed in the new theme. ViewForge detects this and says so on the overview page rather than letting you find out from a customer.
Step 4 — Check what shoppers can actually find
The ViewForge overview answers one question — can shoppers find my parts right now, and if not, what do I click — and it says so in a plain sentence at the top of the page:
- “Shoppers can’t search your store by vehicle yet. Three steps to change that.”
- “Your search box is ready. It has nothing to search yet.”
- “Shoppers can find 340 of your 4,000 products. The other 3,660 return nothing.”
- “Live on your store. Shoppers can find 3,940 of your 4,000 products.”
- “Your search box isn’t on your store right now. Shoppers see nothing where it should be.”
That third one is the one to watch. A coverage percentage on its own is a vanity metric — 100% coverage of 15 products on a 4,000-product store is 0.4% of the catalog. What matters is the absolute count of products that return nothing, which is why there’s a products shoppers can’t find yet list you can work through directly.
Before you announce the feature to customers, test three flows:
- A common vehicle. 2019 Honda Civic. Should return fast, and return parts.
- A rare vehicle. 1983 Saab 900 Turbo. Should either return the relevant parts or say “no parts found for this configuration” — not show unrelated parts.
- A vehicle you don’t carry at all. Should not 500, should not fall back to showing the whole catalog. Should say so and offer a contact path.
Most YMM problems surface in the third case. If the app silently shows every product when no fit is found, you have a worse experience than no YMM at all.
Step 5 — Close the gaps shoppers find for you
Once the search box is live, your shoppers will tell you where your data is thin, for free, if you’re listening.
The signal worth acting on is searches that returned nothing. If forty shoppers this week picked a 2015–2019 Silverado and got an empty page, that’s a stocking decision and a data-coverage decision in one, and it’s a far better priority list than working alphabetically through your catalog. ViewForge surfaces these on the overview; if you use a different app, ask the vendor whether zero-result searches are reported anywhere.
Also worth watching:
- Search → click-through rate. If shoppers search and don’t click, your result page is the problem, not your fitment data.
- Coverage on your biggest collections. Your largest collection is often your thinnest. Finishing one collection usually moves more searches than scattering effort across the catalog.
The data ownership question — why it matters
Most YMM apps store fitment data in an external database. If you uninstall, your data is gone. If they shut down, your data is gone. If their pricing changes and you want to switch, you’re rebuilding your fitment dataset from scratch.
Shopify’s metaobject system is an alternative. Metaobjects are native Shopify records — they live in your store, in your admin, in your GraphQL API. An app that stores fitment in metaobjects gives you a key property: your data outlives the app.
This is why we built ViewForge on metaobjects rather than an external database. It costs us more to operate (Shopify API calls aren’t free), but it means uninstalling ViewForge doesn’t destroy a merchant’s catalog. That’s the right trade-off for a tool that’s going to live on a store for years.
What to watch out for
A few common pitfalls we’ve seen:
- App data silos. If the app stores fitment externally, check the export options — and the price of those exports — before you commit.
- The coverage cliff. A search box over a half-covered catalog looks broken to a shopper in a way that no search box does not. Cover your best sellers before you put it on the homepage.
- Page speed on large catalogs. YMM search with 50,000 products needs a real search index. Ask the vendor what happens at scale.
- Mobile UX. Most parts searches happen on phones. Test the dropdowns on mobile before committing to a block layout.
- Search terms and SEO. Your YMM app shouldn’t block Google from indexing filtered URLs — “2019 Honda Civic brake pads” is a real search query and you want to rank for it.
- Theme changes. Switching themes can silently remove the storefront block. Check that your app detects and tells you, rather than leaving a dead space where the search box used to be.
- Pricing tiers that hide the thing you’re buying. Bulk import, VIN lookup, and description parsing are the features most commonly gated. Work out which tier you’d actually be on before you install — for ViewForge, that’s the table above.
TL;DR
Adding Year / Make / Model search to Shopify comes down to three choices:
- Build it yourself — possible but expensive. Budget 200–400 hours and a lot of metafield complexity gotchas.
- Install a YMM app — fastest path to live. Check where the data lives, what verticals are supported, and which tier the import method you need is on.
- Hybrid — usually not worth the complexity.
If you go the app route, the order that works is: see it running on your own store first, get your best sellers covered before you announce it, and let zero-result searches tell you what to cover next.
Try ViewForge — fitment data stored in Shopify metaobjects, eight verticals beyond automotive, and a free plan that covers manual entry on up to 50 products.
ViewForge is a Shopify YMM / fitment app built by Normal View. Metaobject-native, eight verticals. Free plan covers manual fitment entry on up to 50 products; CSV import starts at $19/month and Smart Parse at $49/month.